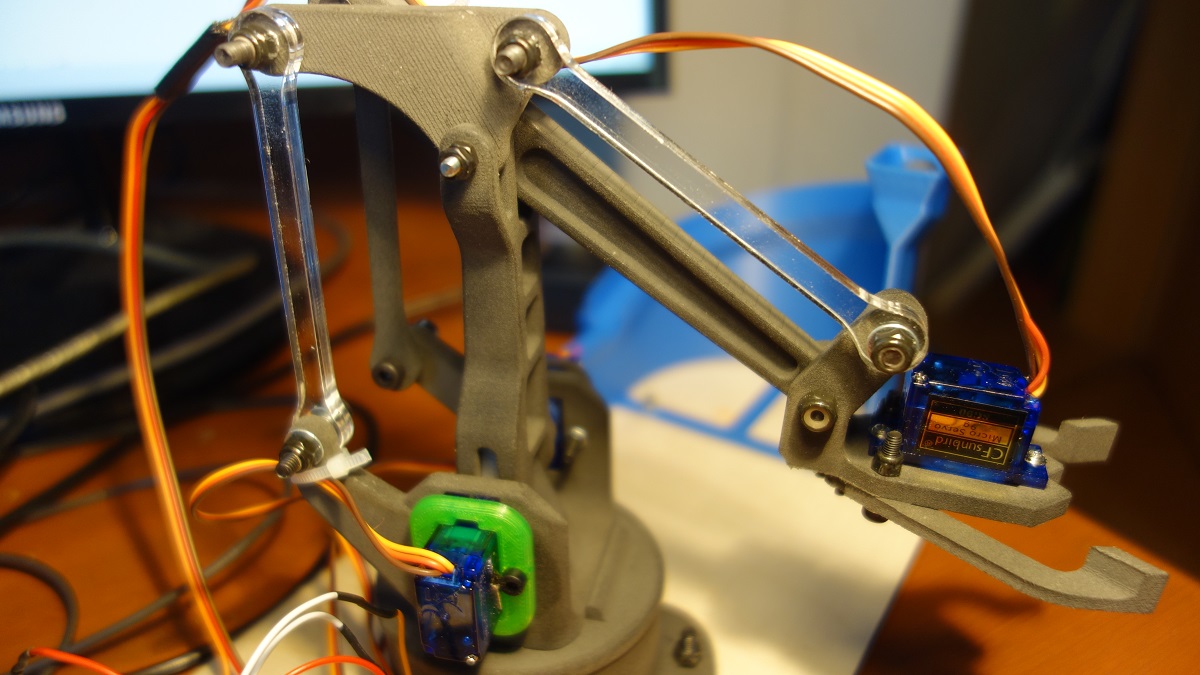
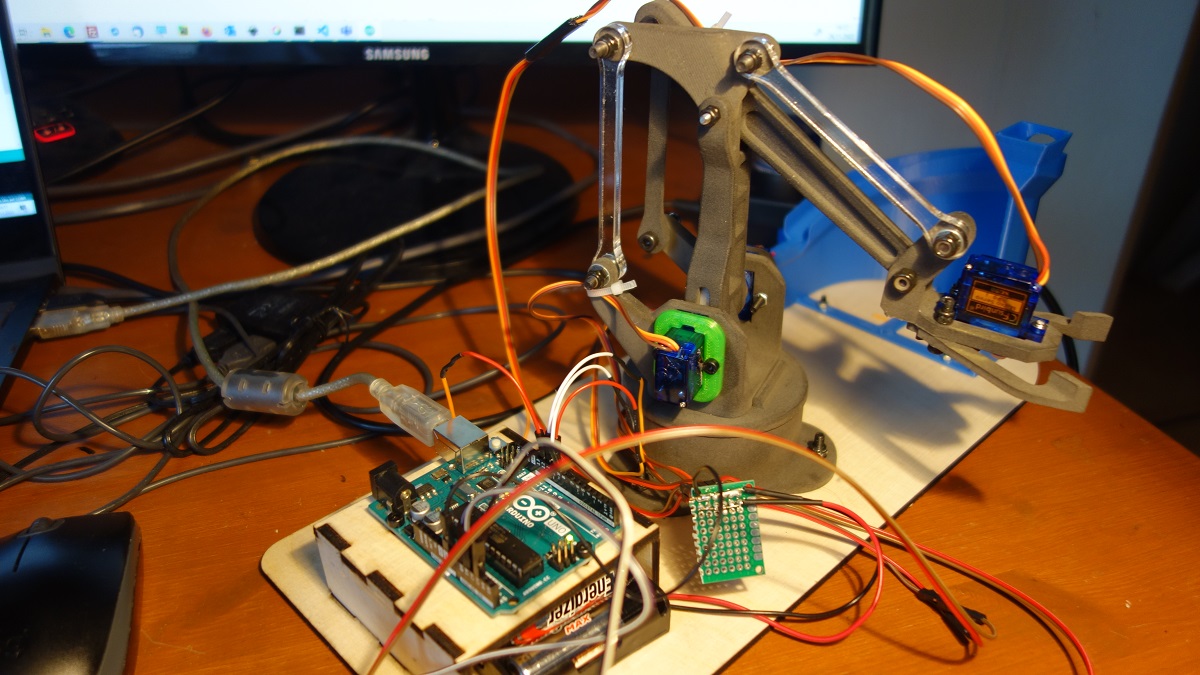
Autonomously Working Robot
In the last step, I would like to show you how you can get the robot to perform tasks autonomously using the previous development steps. The idea is to use the program from step 5 (control via joysticks) to write down the desired movements (positions of all servos) and then use the program from step 3 to execute the movements autonomously.
How Does It Work?
Steer the robot to the first desired position and note the current servo position from the serial monnitor. Then move to the next position and repeat.
Exmple data (which just fit my test environment, don't use these):

Pos     base    shoulder    elbow   gripper
1       54      112         106     90
2       54      112         106     23
3       54      76          90      23
4       124     76          90      23
5       124     120         90      23
6       ...
Program for Autonomous Positioning
In the following program you can store all desired positions in an array. The program sets all servos to 90 degrees at program start. After that all positions are processed individually. The joints are always processed in the following order (and must also be stored in this order in the program): base, shoulde, elbow, gripper
Please do NOT FORGET to adjust the NUMBER OF POSITIONS in line 4 to the current number of positions stored in the array.
/* RobotArm
 * Gently moving a joint
 * Stefan Hager 2022
 *
 *
 * Note: it is important that the servo is already in
 * the position provided to the constructor
 */

#ifndef _JOINT_H_
#define _JOINT_H_

#include <Servo.h>
#include "Arduino.h"


 class Joint
 {
   private:
    int pin, currentPos, speed;
    Servo servo;
   public:
    Joint(int _pin, int _currentPos, int _speed); // constructor
    void start();
    void moveToTargetPosition(int _angle);
 };

  #endif
/* RobotArm
 * Gently moving a joint
 * Stefan Hager 2022
 */

#include "joint.h"

// initialize the joint

Joint::Joint(int _pin, int _currentPos, int _speed)
{ pin = _pin;
  speed = _speed;
  currentPos =  _currentPos;
}

void Joint::start()
{
  servo.attach(pin);
  servo.write(currentPos);
}

void Joint::moveToTargetPosition(int target_angle)
{
  if(target_angle < 0)
    target_angle = 0;
  if(target_angle > 180)
    target_angle = 180;

  if(currentPos <= target_angle)
  {
    while(currentPos <= target_angle)
    {
      currentPos = currentPos + speed;
      servo.write(currentPos);
      delay(20);
    }
  }

  if(currentPos >= target_angle)
  {
    while(currentPos >= target_angle)
    {
      currentPos = currentPos - speed;
      servo.write(currentPos);
      delay(20);
    }
  }
}
/* RobotArm
 * Autonomous Positioning
 * Stefan Hager 2022
 */

#include "joint.h"

// **** ADAPT ARRAY LENGHT TO NUMBER OF POSITIONS
#define numberofpositions 5

int speed = 1;

Joint base(9,90,speed);
Joint shoulder(10,90,speed);
Joint elbow(11,90,speed);
Joint gripper(12,90,speed);

typedef struct
{
  int base;
  int shoulder;
  int elbow;
  int gripper;
}  pos_type;

pos_type steps[numberofpositions];

void setup()
{

  // ** DEFINE THE STEPS HERE
  //  order : base shoulder elbow gripper
  steps[0] = (pos_type) { 90, 90, 90, 90 };
  steps[1] = (pos_type) { 120, 110, 70, 30 };
  steps[2] = (pos_type) { 120, 110, 45, 30 };
  steps[3] = (pos_type) { 50, 120, 100, 90 };
  steps[4] = (pos_type) { 90, 90, 90, 90 };

  // opens serial port, sets data rate to 9600 bps
  Serial.begin(9600);
  base.start();
  shoulder.start();
  elbow.start();
  gripper.start();
}

void loop()
{
  for(int i = 0; i < numberofpositions; i++)
  {
    setPosition(steps[i]);
    delay(300);
  }
}

void setPosition(pos_type next)
{
  Serial.print("Next -> Base: ");
  base.moveToTargetPosition(next.base);
  Serial.print(next.base);
  delay(100);
  Serial.print(" -> Shoulder: ");
  shoulder.moveToTargetPosition(next.shoulder);
  Serial.print(next.shoulder);
  delay(100);
  Serial.print(" -> Elbow: ");
  elbow.moveToTargetPosition(next.elbow);
  Serial.print(next.elbow);
  delay(100);
  Serial.print(" -> Gripper: ");
  gripper.moveToTargetPosition(next.gripper);
  Serial.println(next.gripper);
}
Done...
Hope you had fun developing your robotic arm!