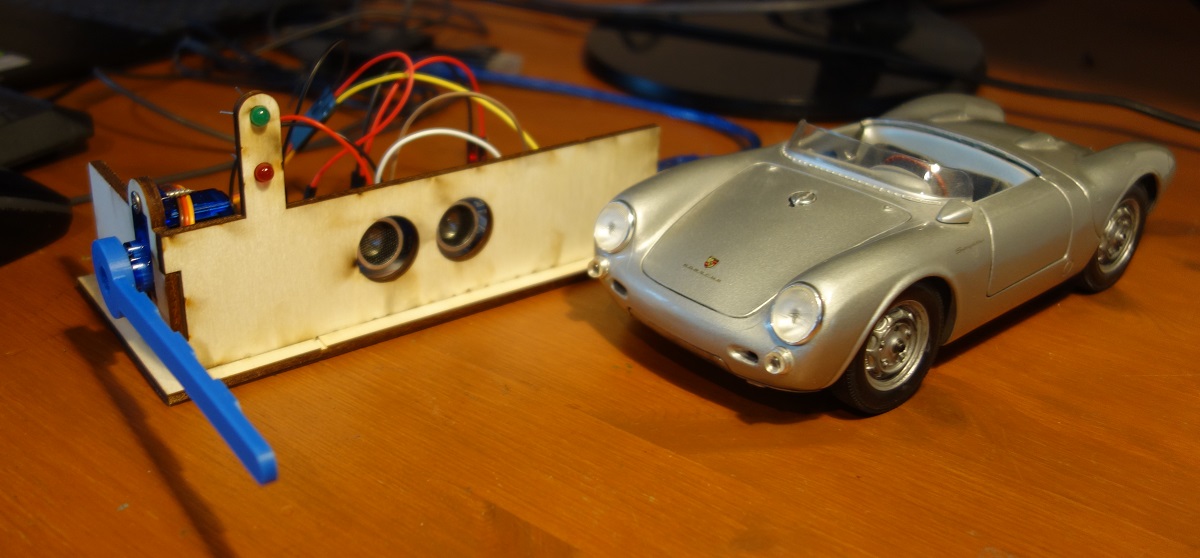
Smart Gate Project
Smart Gate is an ideal project to get started with Arduino. It is really simple, but contains all the essential components needed for more complex projects: you have to control a servo motor to open and close the gate, to query an ultrasonic sensor and to switch a red and a green led.
Building the Smart Gate ... Step by Step
As this project is primarily intended as a tutorial, the smart gate is developed step by step and each step is explained individually: We start with the control of the servo motor. After that the reading of the ultrasonic sensor gets explained. For each step I will explain the hardware structure and provide you with the corresponding software. The last step is then to integrate software for both parts.
For those who want to dive deeper into the Arduino software development, the smart gate can be expanded to include three LEDs which are used for interaction with the user (indication of whether the passage is allowed or not or whether you have to wait until the gate is ready for the next car).
Required Parts
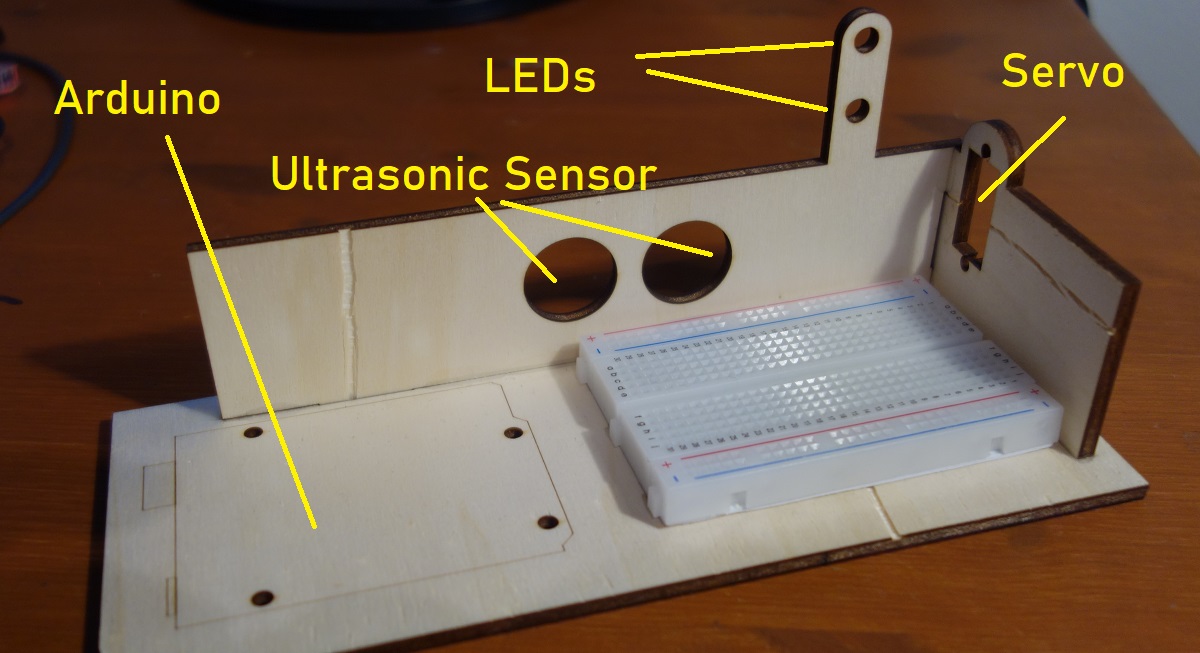
1 x Arduino Uno
1 x Servo SG 90
1 x HC-SR04 Ultrasonic Sensor
1 x Breadboard
1 x Cardboard or Plywood (for the mounts)
STEP 1: Open and Close the Gate
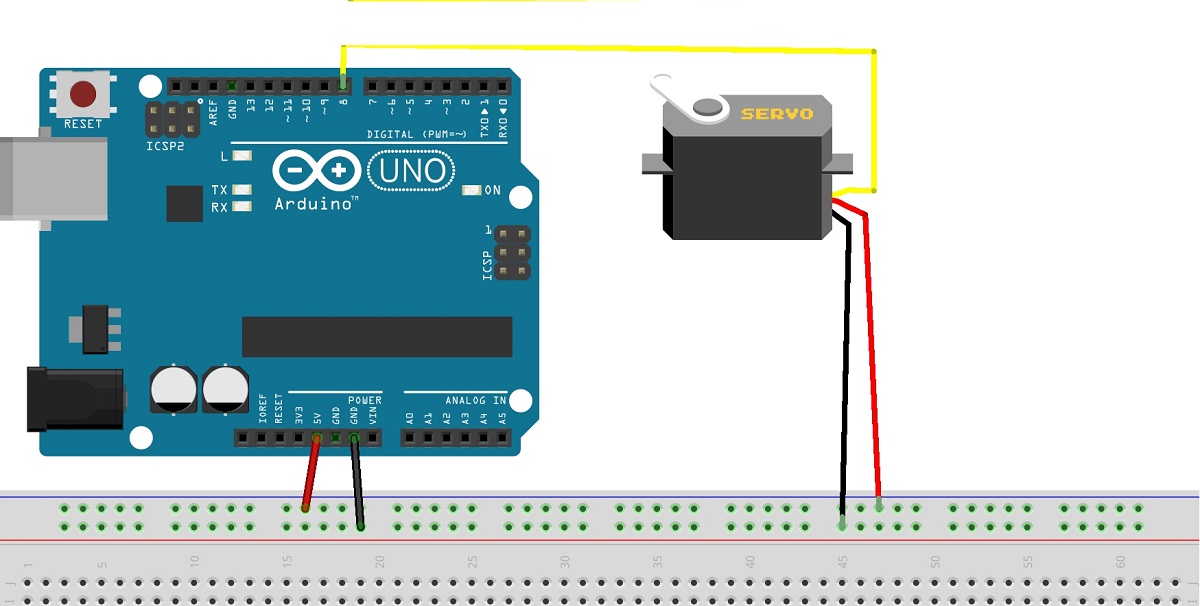
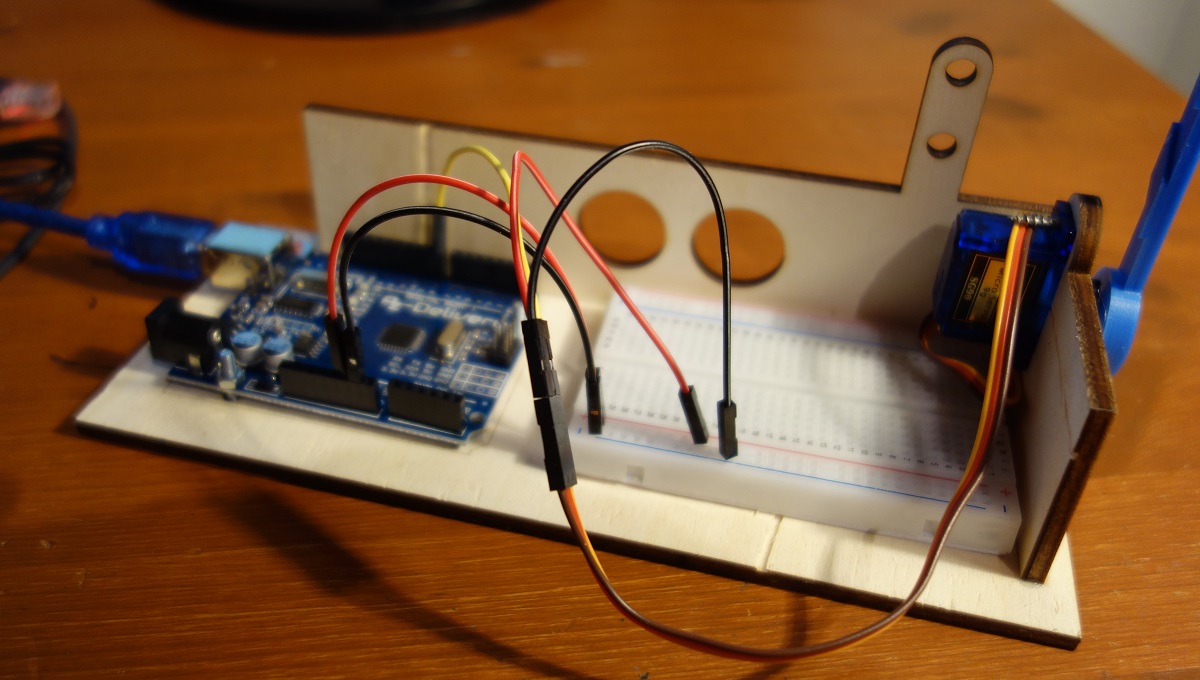
In the first step, the barrier should simply be opened and closed again after a few seconds. Depending on the position in which the servo was installed, this only means bringing the servo to a 90 degree start position, then setting it to 180 degrees to open the gate and going back to 90 degrees to close it.
Program for STEP 1
The program is very simple: after the start the servo is set to 90 degrees. This is our start position. Then the servo is moved to 180 degrees to open the gate for 5 seconds. To close the gate it is moved to 90 degrees again. To make the program a bit more readable, i have outsourced the opening and closing to separate functions.
/* Smart Gate Tutorial - STEP 1
 * Automated gate using a ultrasonic sensor and a servo to open the gate
 * Opens the gate, waits für 5 seconds and closes the gate
 * repeats after 2 seconds
 *
 * (c) Stefan Hager 2023
 */

// You need to include the servo library
#include <Servo.h>

// create object myservo from class Servo
Servo gate;

void setup()
{
  gate.attach(8);  // connect Servo with PIN 8
  gate.write(90);  // use 90 degrees as start value

}

void loop()
{
  openGate();
  delay(5000);
  closeGate();
  delay(2000);
}

// opens the gate
void openGate()
{
  gate.write(180);
}


// closes the gate
void closeGate()
{
  gate.write(90);
}
STEP 2: A bit slower please ...
You may have noticed that the gate opens and closes very quickly. If you want, you can make the movement a little smoother and slower: in the functions openGate() and closeGate() you can add a loop that moves the servo in small steps to the desired position.
/* Smart Gate Tutorial - STEP  2
 * Automated gate using a ultrasonic sensor and a servo to open the gate
 * Opens the gate, waits für 5 seconds and closes the gate
 * repeats after 2 seconds
 *
 * (c) Stefan Hager 2023
 */

// You need to include the servo library
#include <Servo.h>

// create object myservo from class Servo
Servo gate;

void setup()
{
  gate.attach(8);  // connect Servo with PIN 8
  gate.write(90);  // use 90 degrees as start value

}

void loop()
{
  openGate();
  delay(5000);
  closeGate();
  delay(2000);
}

// opens the gate
void openGate()
{
  // move slowly from 90 to 180 degrees
  for(int pos = 90; pos <= 180; pos++)
  {
    gate.write(pos);
    delay(10);
  }
}


// closes the gate
void closeGate()
{
  // slowly move back
  for(int pos = 180; pos >= 90; pos--)
  {
    gate.write(pos);
    delay(10);
  }
}